


02 Setting up Sites and Pages
© Z-point - 20???
Setting up Sites and Pages
=================
Creating a site using a design template
To create a site using a design template
To start a new site from scratch (via Startup Assistant)
To start a new blank site during your WebPlus session
=================
VERVOLG PAGINA:
Understanding pages and master pages
Attaching different master pages
Adding, removing and rearranging pages
=================

Startup Assistant <TOP>
Once WebPlus has been installed, you're ready to start.
• For Windows Vista/7: Setup adds a Serif WebPlus X8 item to the All Programs submenu of the Windows Start menu. Use the Windows Start button to pop up the Start menu, click on All Programs and then click Serif WebPlus X8.
• For Windows 8: The Setup routine during install adds a Serif WebPlus X8 entry to the desktop and also to the Start screen. Double-
On program launch, the Startup Assistant is displayed which offers different routes into WebPlus:
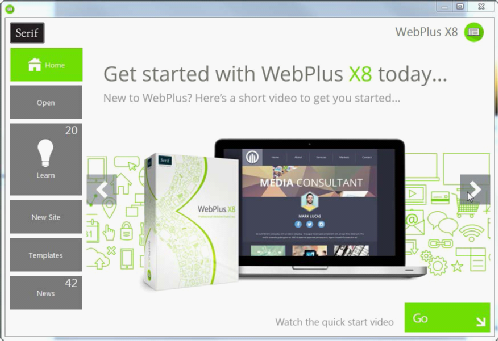
The options are described as follows:
 The default home page keeps you in touch with Serif promotions and showcases rticles (tutorials, etc.) You can also view the WebPlus Overview and Quick Start video.

To access WebPlus files; also provides recent file history.
For online video/written tutorials, help, tips & tricks, and more—all via an updating feed that can be filtered by article Type. The Product Help and your electronic WebPlus X8 user guide are also provided.
Creates a new website from scratch, using a simple setup.
Creates an instant website from a pre-
For cross-
Any time you access the Startup Assistant, the Learn or News buttons indicate the number of new articles to be viewed (if available). This number will decrease as you read each article in the Learn or News pane. When new articles arrive, these will be indicated the next time you open the Startup Assistant.
!!!-
To access the Startup Assistant when WebPlus is already running,
choose Startup Assistant from the File menu.
-
Creating a site using a design template <TOP>
WebPlus comes complete with a whole range of categorized design templates which will speed you through the creation of all kinds of websites.
Each template offers:
• Complementary design—Professionally designed layout with high-
• Schemes—choose a named color scheme to apply a specific look and feel.
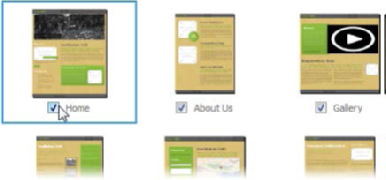
• Page selection—select some or all template pages (e.g., Home, Products, About Us, etc.) to base your new site on.
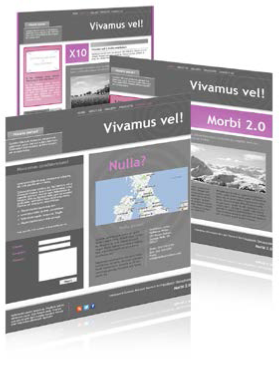
Design templates come in two types—theme layouts and ready-
Pro templates.
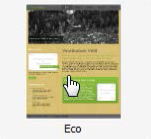
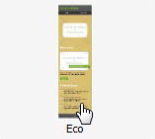
Theme layouts
These offer a choice of themes
(e.g., Eco, Pop, Prospectus,
and many more) on which to
base your site. Simply add
your own pictures to
placeholders and personalize
placeholder titles and text,
then publish.

Ready-
These are categorized
templates containing royaltyfree
pictures and catchy titles
which can be adopted to fasttrack
you to your completed
website. You just need to
personalize placeholder text,
and then publish.
Equivalent mobile-
and Pro templates—these can be used to create your own site optimized
for smart phone access.
To create a site using a design template: <TOP>
1. Open WebPlus, or select Startup Assistant from the File menu.
2. Click Templates.
3. From the Templates pane, select a desktop or mobile option from Theme Layouts or WebPlus X8 Pro Templates categories.
4. Navigate the main pane by scrolling using the right-
5. Select a thumbnail design you like from the main pane.
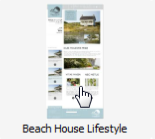
Theme Layout (Desktop) heme Layout (Mobile) Pro Design Template (Desktop) Pro Design Template (Mobile)
6. From the right-
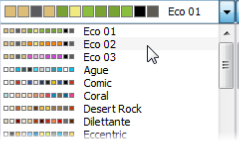
7. Pick a Color Scheme from the drop-
 (the first three schemes are designed specifically for the chosen template). With the drop-
8. (Optional) Use the BACK button if you want to alter your choices.
9. Click OK. The pages are added to your new site.
Starting a site from scratch <TOP>
Although design templates (p. 14) can simplify your design choices, you can just as easily start out from scratch with a new, blank site. Your site is created via the Startup Assistant which helps cover the key aspects of your site's creation.
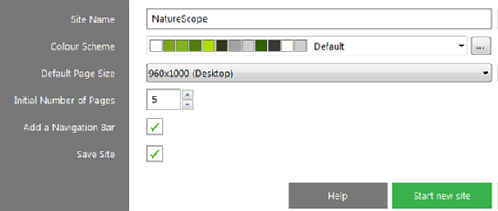
To start a new site from scratch (via Startup Assistant):
1. Open WebPlus to display the Startup Assistant.
-
Select Startup Assistant from the File menu (during your session).
2. Select New Site.
3. Complete the details in the displayed main pane.
4. Click Start new site. Your site is created, ready for editing.
At this stage and subsequently, Site Properties can be edited to fine-
your site settings. Select Site Properties via the Properties menu.
!!!-
From the Startup Assistant, you can press the Esc key to open a
blank publication using default page properties.
-
To start a new blank site during your WebPlus session:
• During your WebPlus session, click New Site on the
Standard toolbar.
The new site opens with a blank page using default site properties.
Opening an existing site <TOP>
You can open an existing WebPlus site from the Startup Assistant, Standard toolbar, or via the File menu.
To open an existing publication (via Startup Assistant):
1. Open WebPlus to display the initial Startup Assistant.
-
Select Startup Assistant from the File menu (during your session).
2. Select Open.
3. Several options are possible:
i. For recently opened sites, select a thumbnail from the main
pane.
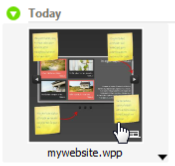
ii. The site opens in your workspace.
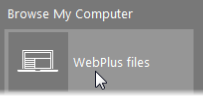
-
i. For other WebPlus sites, select WebPlus files from the
Browse My Computer pane.
Understanding site structure <TOP>
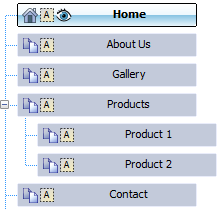
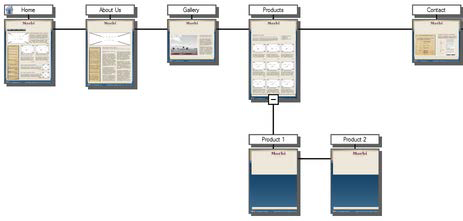
The "structure" of a website has nothing to do with its physical layout, or where pages are stored. Rather, it's a way of logically arranging the content on the site so that visitors have an easier time navigating through it. One of the most useful organizing principles—which WebPlus strongly reinforces—is an "inverted tree" structure that starts with the Home page and then branches out to other pages. To the visitor navigating your site, this arrangement presents your content in a familiar, hierarchical way, structured into sections and levels.
• A section is a content category, each being a separate page, e.g. "Home, "About Us", "Gallery", "Products", and "Contact".
• The level is the number of steps (i.e., jumps) a given page is removed from its "parent" page. The Home page will always reside at Level 1, normally along with "section" pages. This allows navigation bars to work easily and automatically. Pages one step below the "section" pages reside at Level 2, and are considered to be child pages of the "parent" page.

Viewing site structure <TOP>
Two ways of viewing the site structure are possible: via the Pages tab or via the Site Structure View. The latter is ideal for viewing larger sites.
Via Pages tab <TOP>
In WebPlus, the Site Structure tree (in the Pages tab) provides a visual aid that lets you organize the content on your site into sections and levels. Here's how the above structure might appear:
Via Site Structure View <TOP>
For larger websites, Site Structure view can be used instead of the Pages tab to provide a full-
To view your site structure: <TOP>
• From the Standard toolbar, select  View Site Structure.
The toolbar also lets you show and preview pages, include/exclude pages in navigation, rearrange pages by drag-