


11 Assets for Creativity
© Z-point - 20???
Assets for Creativity
=================
Adding assets to your Assets tab
Storing custom assets and asset settings
Pinning categories and individual assets
=================

Using assets <TOP>
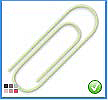
An asset is a general term for any object or page element that can be added to your page to enhance its appearance, increase efficiency, or personalize your design. Assets range from graphics, backgrounds, pictures, picture frames, buttons, sliders/panels, various settings, to more complex page content and entire pages.

To use assets, WebPlus provides the Assets tab, powered by both an Asset Browser and Asset Manager (p. 144 and WebPlus Help, respectively). The former browses your assets, the latter lets you create and manage custom Asset Packs.
!!!-
Theme Layout design templates come complete with their own
built-
theme layout the Assets tab will be populated with associated
assets automatically!
-
Using the Assets tab <TOP>
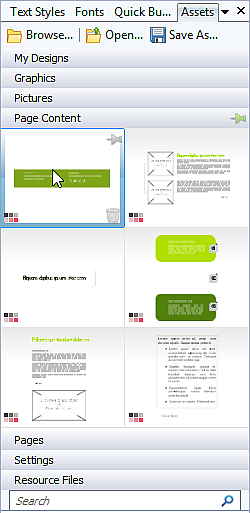 The Assets tab is a powerful design resource that exclusively hosts your browsed assets, ready for adding to your web page.
The tab also lets you save your own
page objects for reuse globally or for use just in your site (by dragging to the My Designs category or dragging to another tab's category respectively). Settings, rather than actual objects, can be saved exclusively to the tab's Settings category.
See Storing custom assets and asset settings.
Browsing for assets <TOP>
Although initially empty, the tab can be populated with pre-
The Asset Browser
The Asset Browser lets you browse by asset category and Asset Pack (Pack Files), as well as search (by tag) for assets. Once displayed, the asset can be selected for inclusion in the Assets tab. See Asset browsing for more information.
The Asset Manager
Use the Asset Manager to create your own Asset Packs by using assets
from other Asset Packs and/or by importing pictures, graphics, or PagePlus pack files. You can tag assets and then save or export your custom asset pack. (See WebPlus Help for details.)
Asset browsing <TOP>
The Asset Browser offers a whole range of professional ready-
designs, called assets, that you can use directly in your site. These
designs are provided in categorized pack files (also known as Asset
Packs), installed with WebPlus.
There are two ways to browse assets before adding assets to your
workspace—by category or by pack file.

You can also use the search controls at the top-
To browse assets (by category):
1. From the Assets tab, click  Browse.
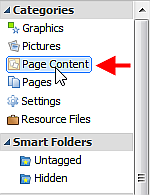
 2. In the Asset Browser, select an asset category from the Categories section.
For example, for Graphics, you'll see available graphics appear in sub-

3. Scroll through the sub-
To browse assets (by Pack File):
1. From the Assets tab, click Browse.
2. In the Asset Browser, on the left-
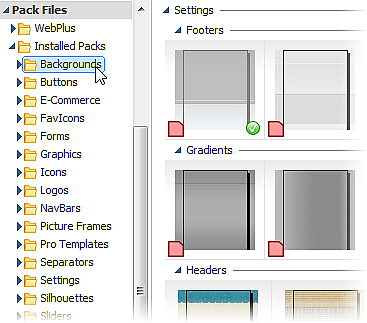
3. Scroll through to browse the assets included in each pack file. To make browsing easier, you can expand and collapse the categories or pack files to hide or reveal the assets.
Searching for assets <TOP>
The search facility filters assets based on preset and custom tags applied to all of the pack files shown in the Asset Browser.
To apply a search filter:
• For a simple tag search, type the word or letter you want to search for in the Search text box, situated at the top of the dialog. This is great for retrieving assets with custom tags.
!!!-
If your search results are being restricted to the currently
highlighted category, Smart folder, Smart tag, or pack file, you can
click the appropriate section header to remove this restriction.
-
Filtering assets <TOP>
Filtering means that you can restrict the amount of assets on display.
• For category and/or pack file filtering, select a category or pack file (or multiple instances using Ctrl-
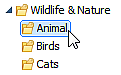 • For Smart tag filtering, select a tag name from the Smart Tags section (scroll down the left-
• For tag-
Adding assets to your Assets tab <TOP>
To add a specific asset:
 • Select the category or pack file in the Asset Browser, and then simply click the asset. A check mark shows on the thumbnail.
To add all assets:
• Click Add All from the upper-
With either method, asset(s) will be available to you from the Assets tab when you close the Asset Browser.
To remove a specific asset (or all assets):
• From Asset Browser, click on the asset's thumbnail (or click
Remove All).
-
• From the Assets tab, click Remove on the hovered-
!!!-
Any asset stored in your Assets tab (but not added to the page) will be available to you the next time you open your site. Assets can be made globally available by pinning in the relevant tab category. Custom designs can also be made global by dragging page objects to the tab's My Designs category.
-
Adding assets to your page <TOP>
To add an asset to the page:
• Click its thumbnail in the design category and drag it out onto
the page.
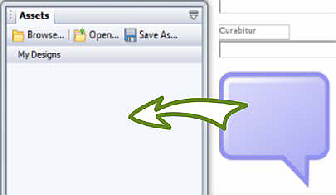
Storing custom assets and asset settings <TOP>
WebPlus lets you create and store custom assets from objects on the page; the settings of an object (its color) can also be saved. This allows the assets to be used again either in your current WebPlus site or globally in any site in the future.
Objects and settings are added to the Assets tab by dragging from the
page, then dragging back onto your page where (and when) you want it.
!!!-
Pages can't be dragged off your workspace but are added from
within the tab category instead.
-
Storing to My Designs <TOP>
If you're keen on storing your own objects for global use, the Assets tab's My Designs category is ideal—the stored assets will always be available in any new site you create.
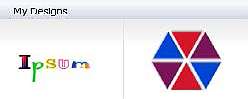 When you first install WebPlus, the My Designs gallery will be empty, ready for objects to be added to it.
To store an object in My Designs:
• Drag the object from the page and drop it onto the Assets tab's My Designs category. You don't need to expand the category in advance, as it will automatically expand for you.
If you drag an object to any other category (or select pre-
Storing Pages <TOP>
Any page already present in your site can be stored in the Assets tab (Pages category).
To store a page:
1. From the Assets tab's Pages category, click Add.
2. From the dialog, check a page (or master page) that exists in your site.
3. Click OK. The page appears in the Pages category.
Storing asset settings <TOP>
Instead of storing an object, it's possible to store just an object's settings for reuse at a later date. As an example, a custom button's design could be saved, rather than the button itself.
Like storing objects, settings can be stored by drag and drop of the object, but to the Settings category only. A pop-
Pinning categories and individual assets <TOP>
Individual assets and entire categories within the Assets tab can be made available for all sites (i.e., globally) if they are pinned.
!!!-
Assets can only be pinned if they have been saved as part of an
asset pack. If you attempt to pin an unsaved asset, you will be
prompted to save your asset pack.
-
To pin and unpin assets:
• To pin all the assets in a category, click  Pin All on the
category header.
-
To pin an individual asset, click the  icon on the individual
asset.
• To unpin all the assets in a category, click  Unpin All on the
category header.
-
To unpin an individual asset, click the  icon on the
individual asset.