


06/2 smart-objects.html
© Z-point - 20???
VERVOLG
=============

Using Smart Objects <TOP>
For managed content, WebPlus uses server-
Let's look at each Smart Object you'll find in Serif Web Resources and what you can do with them.
 Accommodation Booker <TOP>
Host the online booking of guest house, motel, and bed & breakfast rooms, with pricing options for different date periods and days of the week.
 Blog <TOP>
A blog acts as a personal journal on your web page which hosts your own published articles in an easy-
!-
You can also drag a blog onto the
page via the Quick Build tab.
-
 Content Management System (CMS) <TOP>
Lets the web developer add content to web pages remotely without accessing and publishing via WebPlus. Content is article-
 Forum <TOP>
Add a thread-
!!!-
You can also drag a forum onto the page via the Quick Build tab.
-
 News <TOP>
Add a news window onto your page.
!!!-
You can also drag a news window onto the page via the Quick Build tab.
-
 Poll <TOP>
Set up an online poll to canvass web visitors' opinions.
 Resource Booker <TOP>
Host the online booking of meeting rooms, rehearsal rooms, theater tickets, and more. Book by the hour or by the day, as recurring bookings, and with pricing options for different age groups.
 Shout Box <TOP>
Acts as an interactive chat window. Let your web visitors chat amongst themselves.
!-
As Smart Objects are stored in Serif Web Resources, you can use
Help buttons accompanying each Smart Object (as you create and
manage them) for more detailed information.
-
For security reasons, the objects are only available via a Serif Web Resources login accessible from within WebPlus. If you don't have a valid username and password you must create a Serif Web Resources account first.
To create a Serif Web Resources account: <TOP>
1. From the Insert menu, select Smart Object.
2. In the login dialog, complete the New User? form. You'll need to review and agree to Serif's terms and conditions of use (via a check box).
3. Click the Signup button.
4. An additional dialog, will ask for personal details, plus a few check boxes if you would like to receive the Serif Community newsletter, Serif offers, and/or other third-
5. A confirmation email will be sent to your email address. Click the link in the email and you're ready to login to Serif Web Resources
(via Insert>Smart Object or www.serifwebresources.com).
To clear Account details: <TOP>
• Go to Tools>Options and click Clear Account Details shown from the Options>General menu option. This will clear the stored login details for Serif Web Resources so that automatic login will no longer work. Details will need to be entered next time so be sure you've remembered your password.
To access Serif Web Resources: <TOP>
1. From the Insert menu, select Smart Object.
2. At the login prompt enter your username and your password. Check Remember account details to access Web Resources directly in future (bypassing the login screen).
3. Click the Login button.
To log out of Serif Web Resources: <TOP>
• From the Smart Objects dialog, click the log icon and select Log out.
Creating a Site Membership Manager <TOP>
If you're a new user you have to create a Site Membership Manager for your site to allow Smart Objects to be created. Think of the Manager as a "hub" for the Smart Objects you want to include in your site.
!!!-
The Site Membership Manager is also used to control access to
some Smart Objects such as forums and blogs, as well as providing
access control to pages. See Setting up your Site Membership
Manager.
-
Once your Site Membership Manager is created, Smart Objects can be created from it, configured, and edited before adding to the web page immediately or at a later date.
Creating Smart Objects <TOP>
A Smart Object can be created from a selected Site Membership Manager. Typically you would only add a single forum to your site, but your site could have multiple blogs, news objects, shout boxes, and polls spread throughout your site. Each object needs to be created in the SiteMembership Manager.
Before going any further, bear in mind that the same Smart Object can be inserted into your site multiple times, optionally changing its appearance and how it displays. (See Editing Smart Objects on p. 97.)
!!!-
Some Smart Objects such as login forms, forums, blogs, and news
windows can be dragged onto the page from the Quick Build tab.
-
To create a Smart Object: <TOP>
1. From the Insert menu, select Smart Object.
2. From the Site Membership Managers dialog, select the manager entry for the site you want to add a Smart Object to.
3. From the Insert Smart Objects dialog, click New.
4. In the Create Smart Object dialog, use the scroll bar to navigate the list, then select a Smart Object.
5. Click OK.
Configuring Smart Objects <TOP>
The created Smart Object needs to be named, given a description, and, in some cases, have settings configured to control the way the Smart Object operates.
1. From the Configure dialog:
• Enter your own Name for the object. This displays next to the Smart Object under the Site Membership Manager entry for easy identification.
• Set the Language to be used for your object.
• Depending on the Smart Object type, settings will vary.Use the Help button on each Smart Object's Configure dialog for a detailed description of each option.
2. Click Create.
Once on your page, you can re-
and selecting Configure.
Editing Smart Objects <TOP>
Editing the Smart Object means changing the appearance of the object to suit your site's design. Typically, you might want to alter the appearance of the object from its original settings. The settings depend on the type of object selected.
Once an object is created it can be edited either from your Site Membership Manager or directly on the page.
To edit a Smart Object from your Site Membership Manager: <TOP>
• From the Edit dialog's Appearance Settings, select a
background color and configure other settings depending on
the type of Smart Object.
Selecting an object from within the Smart Objects library view (having expanded the Site Membership Manager) will also open the Edit dialog.
To edit a Smart Object on your page: <TOP>
• Double-
!!!-
Editing an object only affects the object on the page and does not
alter any collected data.
You can insert multiple instances of the same Smart Object. Each
separate instance can then be edited independently.
-
Adding Smart Objects to your page <TOP>
To add a Smart Object to your web page:
1. From the Edit dialog, click the Insert button.
2. To insert the object at a default size, position the  cursor where you want the object to appear on the page, then simply click the mouse.
-
Drag the cursor across the page to size the Smart Object.
The Smart Object will automatically preview on the page so you'll get a good feel for how your published Smart Object will look.
Managing Smart Objects <TOP>
While configuring Smart Objects affects how the object operates, managing Smart objects can be used to manage the object's "gathered" data when the web page is published. More complex Smart Objects (e.g., a Forum, Blog, Accommodation Booker, Resource Booker, Poll, or Shout Box) store collected visitor data such as article comments, email addresses, poll results, and a chat messaging log. For example, for Blogs creating and managing articles is a fundamental part of the management process.
To manage a Smart Object from your Site Membership Manager:
1. From your Site Membership Manager, double-
Object.
2. From the Edit dialog, click Manage. The management options
differ for each Smart Object type.
You'll be taken to Serif Web Resources where you can manage
your Smart Object.
!!!-
Once on your page, you can manage the Smart Object by rightclicking and selecting Manage.
For more management information and a description of each option, click the Help button in any Smart Object dialog.
If you're on the move or working remotely, you can always monitor and update this managed content by using Serif Web Resources. A republish of your website is not necessary.
-
Site Membership Manager <TOP>
The Site Membership Manager in Serif Web Resources serves two functions:
• You can apply security to your site, either to restrict access to specific pages or to control which users can access forums, edit blog articles or create CMS content.
• The Site Membership Manager acts as a "hub" for creating, editing and managing Smart Objects such as blogs and forums.
Only one Site Membership Manager can be created per website. If you're
a multi-
site's Site Membership Manager.

Each Site Membership Manager controls its own unique access control arrangements and Smart Objects. See WebPlus Help for more information.
!!!-
If you want to create Smart Objects, see Using Smart Objects on
p. 92.
-
Setting up your Site Membership Manager <TOP>
!!!-
The Site Membership Manager is also used to manage Smart
Objects such as blogs and forums in your site.
-
To create a Site Membership Manager: <TOP>
1. From the Insert menu, select Smart Object.
2. Log in to Serif Web Resources (See Using Smart Objects on p. 92). This assumes you have a valid login; otherwise you will have to register.
3. From the Site Membership Managers dialog, select Create New.
4. In the Configure dialog, you have to set up a Site Name. This is a server-
5. Enter the Site URL, which is the web address of your site, e.g. www.rainbow.org.uk.
6. Click Create. The Site Membership Manager is added as an entry.
7. Click the entry to offer various access control options you might like in your site.
Display options <TOP>
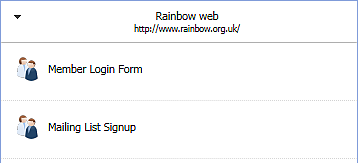
The Site Membership Manager provides several different display options which can be added to your page.
 Member Login Form: Use this option to add a login form directly to your page. Typically of use in personal websites or small enterprise websites, you can allow free access to most of your site, with only a limited set of pages accessible to selected web visitors via login.
!!!-
This login form can also be added via the Quick Build tab.
-
See Login forms on p. 80 for more information.
Mailing List Signup: Have website visitors sign up to newsletters, party confirmations, information request, and many more. Lists can be controlled manually or by selfsubscription. Email addresses can be imported as a delimited text file (CSV) or exported to a range of formats.
See Mailing lists on p. 104 for more information.
Protecting pages with passwords <TOP>
For some pages you may want to restrict access to only a selected group
of users.
WebPlus uses Serif Web Resources to control which users can access the page. Login details are stored in a user group associated with the page which contains a list of authorized users.
To set up your user access control:
1. Create a new Site Membership Manager for your site. (See Site Membership Manager on p. 99.)
2. Login to www.serifwebresources.com.
3. From the Groups tab, enter a group name and click Create Group.
4. From the Members tab, enter a member's email address in the Email field, and click Add Member.
5. Check members to be added from the list, click the Select Action drop-
6. Check the group name, then click OK.
To protect your page with a password:
1. Right-
2. Check Protect page with password to enable access control. You'll notice that the Change/Manage button becomes active. Click this button to reveal currently available user groups (in bold) and the Site Membership Manager to which they belong.
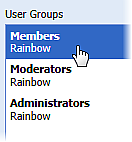 3. From the User Groups dialog, select the user group, e.g. Members (which belongs to the website Rainbow), then click OK. Your page's Page Security tab should show that the page is password protected and that the user group has been assigned.
4. Click OK, then OK again to exit the dialogs.
Mailing Lists <TOP>
As well as login forms, mailing lists can becreated in WebPlus. A mailing list can be added onto a page in your website which allows web visitors to sign up to newsletters, etc.
The mailing list box is part of your Site Membership Manager.
To create a mailing list:
1. Select Insert>Smart Object.
2. From the dialog, select the Site Membership Manager for your site. If you haven't already created one, click Create New.
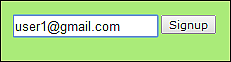
3. From the dialog, select  Mailing List Signup.
4. In the Edit dialog, several options are available:
• Click Configure to set the appearance of your mailing list.
• Click Manage to access www.serifwebresources.com to manage your mailing lists.
• From the Appearance settings box, set a color for your background, border, text/labels, and buttons.
5. Click Insert to add the mailing list box to your page.