


03 Layout Items
© Z-point - 20???
Layout Items
=================
Controlling overflowing frame text
Adding / reorder / delete pictures in the Assets tab
Displaying pictures in lightboxes
To create a lightbox for a picture on your web page
Displaying pictures using Picture Magnifier
Picture adjustments and effects
=================

Inserting text frames <TOP>
Typically, text in WebPlus goes into text frames, which work equally well as containers for single words or standalone paragraphs and articles. You can also use artistic text (see p. 137) for standalone text with special effects, or table text (see Inserting tables on p. 45) for row-
Creating text frames
You add frames to a page as you would any other object.
!!!-
You can select, move, and resize any frame, but you cannot alter its basic shape. (See WebPlus Help for more information.) When you resize a text frame, its story text reflows to the new dimensions.
-
To create a frame: <TOP>
1. On the Quick Build tab (Layout Items category), click  Text Frame.
2. Drag out to place the text frame at your chosen dimensions.
-
Click on the page or pasteboard to create a new frame at a
default size.
Putting text into a frame <TOP>
You can put text into a frame in one of several ways.
WritePlus story editor:
With a selected frame, click WritePlus on the Frame context toolbar
 .
.
Importing text:
Right-
Typing into the frame:
Select the Pointer Tool, then click for an insertion point to type text straight into a frame, or edit existing text. (See Editing text on the page on p. 139.)
Pasting via the Clipboard:
At an insertion point in the text, press Ctrl+V.
Controlling overflowing frame text <TOP>
Fitting story text precisely into text frames is part of the art of laying out websites. If there's too much story text to fit in your text frame, WebPlus stores it in an overflow area hidden from view (but not lost!) at the bottom of the frame.
The Text overflow button  displays under the overflowing frame to indicate this hidden text, so it's important to ensure the text is made to display again, otherwise your story will remain truncated.
To do this, several options are open to you:
• Physically resize your text frame if you have space.
• Consider rewriting your story, making it more concise!
• Resize your text, as described below.
 To resize frame text once frames are sized and positioned, various text sizing and AutoFit options are available on the Frame context toolbar.
Inserting pictures <TOP>
The Assets tab (Pictures category) acts as a "basket" for initially gathering together and then including pictures in your site. Its chief use is to aid the design process by improving efficiency (avoiding having to import pictures one by one) and convenience.
WebPlus also lets you insert pictures from the Quick Build tab or Basic toolbar.
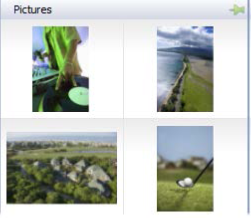
Adding / reorder / delete pictures in the Assets tab <TOP>
To add pictures to the tab:
1. Select the Assets tab's Pictures category, and click Add.
2. From the dialog, navigate to a folder, and select your picture(s).
3. Click Open. Your pictures appear as thumbnails within the Assets tab's Pictures category.
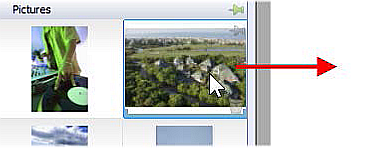
To reorder pictures in the tab:
• Select and drag a picture to a new position in the tab.
To delete a picture from the tab:
• Right-
Adding pictures to the page <TOP>
Pictures can be added to your site by dragging directly onto your page.
To add a picture to your page:
• From the Assets tab (Pictures category), drag a picture thumbnail directly onto the page, inline into artistic/frame text (at a chosen insertion point), or into a placeholder/populated picture frame.
Once added, the picture thumbnail indicates the number of
times the picture has been used in the site ().
!!!-
When placed, pictures are linked to your project by default and not
embedded.
Photos can be embedded using Insert Picture From File on
the Basic toolbar (select Embed Picture in the dialog) or at any time
using the Resource Manager (see WebPlus Help).
-
Replacing pictures <TOP>
You can swap a picture at any time, especially useful when you want to
retain the position and dimensions on the page but want to update the
picture itself. It can be used on any image (uncropped or cropped).
To replace a picture:
1. Click  Replace Picture from File or
  Replace Picture from Assets directly under the selected picture. This sources pictures from anywhere on your computer or from a supplied (or custom) Asset Pack, respectively.
2. Use the Import Picture dialog to select the picture to open.
3. Click Open.
You can also replace a picture with those stored in the Asset
Browser—click Replace Picture from Assets directly under the selected
picture.
Displaying pictures in lightboxes <TOP>
Lightboxes are a simple way of displaying pop-
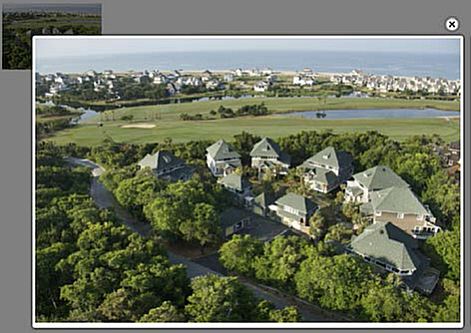
To create a lightbox for a picture on your web page: <TOP>
1. Select the picture (preferably a thumbnail).
2. Create a hyperlink to it (click Hyperlink from the Properties menu).
3. Select Picture from the menu, then from the Target Window tab, choose Lightbox from the Type drop-
Displaying pictures using Picture Magnifier <TOP>
Picture Magnifier lets you hover over areas of your picture for an overlaid or offset magnified view. This is done by applying an action called "Magnifier" by double-
Watermarking pictures <TOP>
 If you want to indicate ownership or copyright of your pictures you can apply preset or custom watermarks to individual and multiple pictures (on page or across site) via the Picture context toolbar.
Sharing via Pinterest <TOP>
Any picture in your site can be shared via the picture-
Cutting out pictures <TOP>
Cutout Studio offers a powerful integrated solution for cutting objects out from their backgrounds. Depending on the make up of your picturesyou can separate subject of interests from their backgrounds, either by retaining the subject of interest (usually people, objects, etc.) or removing a simple uniform background (e.g., sky, studio backdrop). In both instances, the resulting "cutout" image creates an eye-
To launch Cutout Studio: <TOP>
1. Select an image to be cut out.
2. Select  Cutout Studio from the displayed Picture context toolbar. Cutout Studio is launched.
3. Click either  Keep brush or
  Discard brush from the left of the Studio workspace, and paint regions to be kept or discarded. Follow the Help pane in the studio for more detailed information.
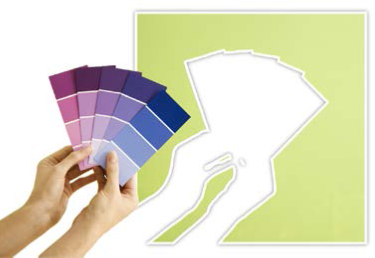
Picture adjustments and effects <TOP>
PhotoLab is a powerful studio for applying adjustment and effect filters to pictures, either individually or in combination!
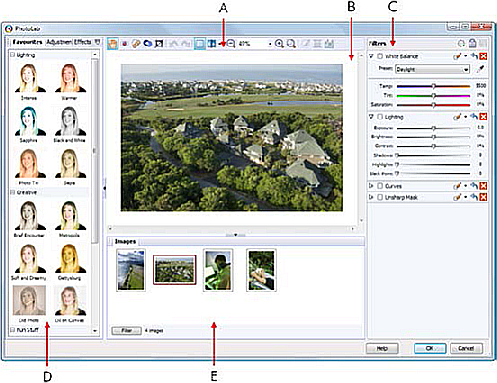
(A) main toolbar, (B) main workspace, (C) filter stack,
(D) filter tabs, (E) Images tab
To launch PhotoLab: <TOP>
1. Select the picture that you want to apply a filter to.
2. Click PhotoLab on the Picture context toolbar.
3. Select a filter from the filter tabs (Favorites, Adjustments, or Effects).
4. Adjust the filter's settings to your liking in the lower-
5. Repeat for additional filters.
6. Click OK.
For more information, see WebPlus Help.
CSS Properties <TOP>
You can also control the border, padding, outline, background images and visibility of your object by adjusting its CSS properties.
CSS properties are stored efficiently as code rather than being created as part of your graphics, and are applied dynamically by visitors' web browsers. For more information, see CSS properties in WebPlus Help.
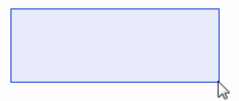
Inserting panels <TOP>
Panels are information boxes superimposed over your web page, which
can host pictures and text (below), as well as shapes and line art.
The ability to superimpose panels means that you can increase the amount of information available to the web visitor without altering the underlying web page content. Panels can also be made to display only when required as you click or roll over buttons, pictures, or other assets. They can also be made to display permanently—great for navigation bars that never disappear on window scrolling!
Panels are also used as building blocks for creating animated sliders (p. 66). Like revolving advertising hoardings around sports stadiums, sliders can be made to change which panel is displayed at set time intervals.
Inserting your panel <TOP>
To insert a panel:
1. From the Quick Build tab (Layout Items category), click Panel.
2. Drag the cursor across your page to define the size and shape of your panel region.
The Insert Panel dialog opens.
3. In the Panel tab:
• Click the panel preview box.

• In the Asset Browser, select a panel background design
and click OK. The preview box updates with your chosen panel design.
4. Click OK.
!!!-
A panel of default size can be created by dragging from the Quick
Build tab directly onto the page. Alternatively, a default basic panel
(without editing via dialog) can be created by Ctrl-
page.
-
To edit a panel:
• Double-
Adding content to your panel <TOP>
You should treat your panel as an empty building block which can be developed using WebPlus standard tools and features. By creating objects within the panel area, they belong to the panel. This extends to objects such as text frames, artistic text, tables, QuickShapes, and pictures. Dragging the panel will also move its associated objects.

Hiding/showing your panel <TOP>
If you've placed a panel on the page, it can be hidden by default, and
then displayed only on hover over.
To hide/show a panel:
1. Select the panel.
2. From the context toolbar, select  Actions. The Edit Panel
dialog opens, displaying the Actions tab.
3. Click Add and choose Visibility from the flyout.
4. Select the panel from the Object ID drop-
5. Select an event from the Event drop-
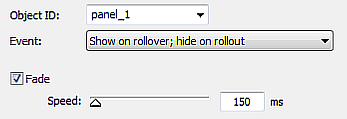
6. Click OK.
Finally, the panel can be hidden with a single click once you've finished
designing it.
To hide a selected panel: <TOP>
• From the context toolbar, select  Show or Hide the object.
!!!-
To toggle the visibility of hidden objects as you design, from the
View menu, select Hidden Objects.
-
On publishing your page, a rollover of the panel will display it.
It's possible to create custom panel backgrounds by using WebPlus's Design Studio. See WebPlus help for more information.
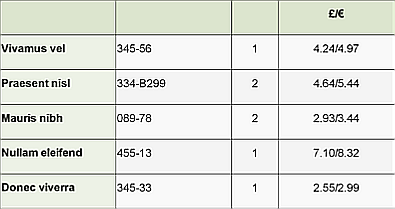
Inserting tables <TOP>
Tables are ideal for presenting text and data in a variety of easily customizable row-
Each cell in a table behaves like a mini-
To insert a table:
1. From the Quick Build tab (Layout Items category), click  Table.
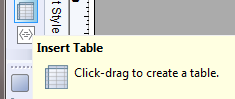
2. Click on your page, or drag out to set the size of your table. The Create Table dialog appears with a selection of preset table formats shown in the Format window.
3. Step through the list to preview the layouts and select one (use up/down keyboard arrows for a "live" preview of each). To begin with a plain table, select (Default).
4. (Optional) Click Edit if you want to further customize your chosen format.
5. Set the Table Size. This is the number of rows and columns that make up the table layout.
6. Click OK. The new table appears on the page.
To modify the structure and cell contents of tables, please see Manipulating tables in WebPlus Help.