


02b-Setting-up-Sites
© Z-point - 20???
VERVOLGPAGINA

Setting site properties <TOP>
Site properties allow settings to be made which will be applied across the entire site. Generally speaking, important site properties (page width, height, etc. are automatically set on selecting a template or when starting from scratch. Other settings do not normally need to be modified (although you can at any time).
Some site properties such as page appearance and search-
To view or change site property settings:
• Select  Site Properties from the default context toolbar.
-
Choose Site Properties from the Properties menu.
Understanding pages and master pages <TOP>
Looking at individual pages from a design standpoint, each WebPlus
page has a "foreground" page and a "background" master page.
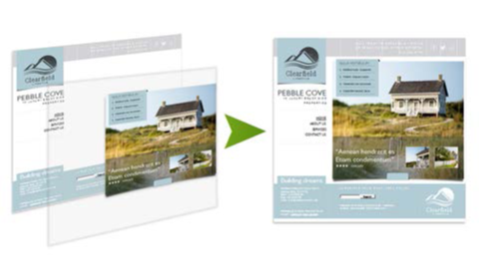
Master pages provide a flexible way to store background elements that you would like to appear on more than one page—for example a logo, background, header/footer, border design, or navigation bar.
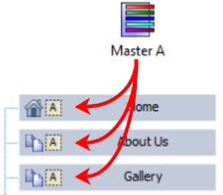
The key concept here is that a particular master page is typically shared by multiple pages, as illustrated below. By placing a design element on a master page and then assigning several pages to use that master page, you ensure that all the pages incorporate that element. Of course, each individual page can have its own elements.

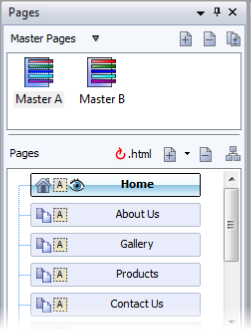
The Pages tab includes an upper Master Pages section containing your master page(s), and a lower Site Structure in the Pages window containing your standard pages. Each page shown in the window indicates the master page being used for that page.
For more varied page designs across your site, you can create more than one master page (see Adding, removing, and rearranging pages on p. 26).
Once you have multiple master pages, they can be attached to separate pages or in combination on the same page.


Attaching different master pages <TOP>
By default, pages created in new sites have a master page (e.g., Master A) automatically attached to them. However, if your site has more than one master page you can attach a different master page to the page instead.
To attach a different master page to a page:
1. In the Pages tab, right-
Properties.
2. From the dialog's Master Pages menu option, uncheck the
original master page, then check the master page you want to
use.
3. Click OK.
To detach a master page:
• Uncheck its entry in the Page Properties dialog (Master Page menu option).
!!!-
Unchecking all master pages means that the page will use the site
appearance (Properties>Site Properties).
-
Adding, removing, and rearranging pages <TOP>
 Using the Pages tab, you can:
• Add and delete pages.
• Add one or more
master pages.
• Use drag-
rearrange pages.
• Add pages from
installed design
templates.
• Add offsite links.
• Add HTML pages.
• Set a page to be the
home page.
Use the upper Master Pages window of the Pages tab to access master pages, and the Pages window (tab's central Site Structure tree) to access pages.
Besides the Pages tab, WebPlus offers a variety of other ways to manipulate pages:
• Site Structure View for a tree view of your site as page thumbnails, with upporting page manipulation.
• Master Page Manager for adding and copying master pages, as well as controlling multiple master pages.
Adding pages <TOP>
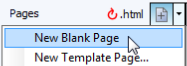
To add a new blank page:
1. In the Pages Window of the Pages tab, select a page after which you want to add the new page.
2. Click the down arrow on the  Add button directly above the Pages tab's Pages Window. From the drop-
3. In the Page Properties dialog, specify options for the new page
from each of the menu options in turn.
4. Click OK.
A new page appears at the specified location in the site structure.
!!!-
Any new page created will use the currently set Site Properties
(Properties menu), such as the default page size and alignment, but
you can overwrite site properties by editing Page Properties.
-
Adding master pages <TOP>
To add a new master page:
1. On the Pages tab, ensure the Master Pages> button is clicked to expand the Master Page Window.
2. Click the Add button above the Master Pages window.
A new master page appears in the Pages tab's Master Pages window.
!!!-
To reassign pages to particular master pages, see Understanding
pages and master pages on p. 23.
-
Deleting pages <TOP>
To delete a page or master page:
1. On the Pages tab, select the page (or master page) to delete by clicking its entry.
2. Click  Delete selected page above the appropriate window to delete the page.
Creating HTML pages <TOP>
HTML pages can be added to any Pages tab's Site Structure. Such pages are included in navigation as standard pages. See Creating HTML pages in WebPlus Help for more information.
Rearranging pages <TOP>
Besides using the Pages tab to add or delete pages, you can use it to rearrange pages as needed.
To move a page:
1. Display the Pages tab.
2. Click to select the page in the Site Structure tree.
3. (Using drag-
 moves the page to the same level as, and following, the
highlighted target page.
 makes the page a child of the page below the highlighted
target page.
Adding template pages <TOP>
While adding a blank page gives you page design freedom, you can make
life a little easier by adopting "ready to go" template pages. You can select template pages that complement your existing theme layout orchoose an independent template page.
This is possible by selecting New Template Page on the Pages tab's Add new page or link drop-
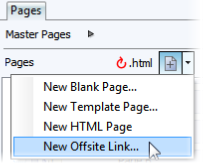
Adding offsite links <TOP>
You can also add an offsite link to your site structure. Typically, this would be a page (blog or forum) or resource separate from your site that you wanted to include in your site's navigation structure. The offsite link appears in the Site Structure tree and in navigation bars, so you can manipulate it just as if it were a page in your site.
The New Offsite Link on the Pages tab's Add new page or link dropdown list allows you to do this.
Setting your home page <TOP>
To make a web page your home page:
• Right-
Setting page properties <TOP>
Your WebPlus site has its own general framework, consisting of the site
itself; one or more master pages; and a number of individual pages.
Each aspect of the framework has various property settings that
contribute to the look and behavior or your site when it's published.
Whether you start with a WebPlus template or from scratch, you can
choose whether to stick with the default property settings or alter them
to suit your needs.
To view or change page (master page) property settings:
• Select Page Properties from the default context toolbar.
-
Right-
Backing up your site to web <TOP>
You can save your WebPlus project file (.wpp) with fonts and linked resources to back it up in your website hosting location, or to somewhere else if you want. This guards against accidental deletion orsomething inadvertently happening to the computer that was used to create the site. Additionally, you can backup as a package. See WebPlus Help.
To Back up to site:
1. Save your site in WebPlus.
2. From the File menu, select Backup Site to Web.
If you attempt to backup your site without configuring your FTP account settings first, a dialog appears. You'll be able to add existing FTP account details as described in Quick Publish. The Backup To web dialog displays. The hosting location where your site is about to backed up to is shown in the Publishing to field.

3. To backup your site to a different hosting location, click Change and update account settings, or add a new account.
4. Check Backup as a package if required.
5. Click OK. The File Operation dialog displays the progress of the backup.
6. Click OK.
Restore your web site <TOP>
1. Click the  Publish site flyout on the Standard toolbar and then click Maintain Web Site.
-
From the File menu, select Publish Site and then choose Maintain Web Site from the submenu.
The Maintain Website dialog appears.
2. Select your FTP account name (from the drop-
3. Click Maintain.
WebPlus seeks an Internet connection and displays a dialog showing the navigable website's folders in the left-
4. In the adjacent window, click to select the WebPlus project file and click Download from Server from the buttons above.
5. From the dialog, select a location on your computer to save the file locally.
6. Click the window's Close button to terminate the FTP connection and return to WebPlus.